mandag 23. september 2013

Bioshock Splicer Bunny Mask

There is something very interesting about Rapture, so until Burial at Sea launces and I can cosplay Elizabeth as femme fatale I will finally do a splicer costume. 

Lady Smith
I chose to cosplay Lady Smith from Biochock 2 with the Bunny mask, an upper class matron. 


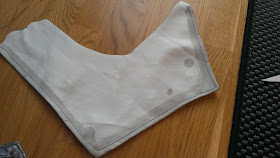
I started off with a cat mask from Panduro and added ears. 

Taped on new ears

Added the battle damage on the side

Smoothed the transition with the new ears using paper mache and a thin layer of all purpose glue. 


And primed it using Gesso. Since this is to be a weathered prop it doesn't matter that it is not completely smooth. Here I have also added details along the eges and around the eye using hot glue gun. (This is a very common technique)

All primed. 

I found an effect paint that would make a crackling effect that I wanted to try. But to use that I had to paint the mask with acryllic paint (which took me even further away from that high gloss finish).

This is the effect paint. First you paint a layer of acryllic paint, let it dry. Then you paint a layer of effect paint and let that dry completely also. Then you paint another layer of acryllic paint. The effect paint will react and subract the layers causing cracks.

This did not work, and only made a soggy mess. So I repainted it white and handpeinted the cracks. For this I used a weathering technique, the result came out a little dark, but I didn't bother to repaint it again. 


Wipe off paint

Add details. Here I have hand painted the cracks and painted all the ornaments and edges gold. 

And some blood (always go for blood). Blood is only watered out dark red acrylic paint splashed on with a brush


Add on the back side too, people will always see you from all angles. 

In true Dexter style I added some blood mist. 


Finish off with a clear coat as to preserve the awesome detailing. 

And Splicer mask is done. 


mandag 16. september 2013

Post-Apocalyptic Movie

I will make my first appearance in a short indie movie soon. I recently got asked to be a part of a short film project in a post-apocalyptic setting. And you know me; I wanted to design my own character for this - which they loved.

Getting the best use of my side cut 
All photo and screenshots taken by Stephen Furubotn Flannagan (director)


A little information about the project, Grindhouse-film; "Kung Fu Viking", inspired by other films as "Italian Spiderman", "Planet Terror" and "Hobo with a Shotgun". 

Please enjoy some screenshots from the project


In my scene some of the post-apocalyptic residents of Norway are having a party on a roof, before a strangers enters our town. Short scene, but fun to be a part of.  

Here are my local party members. Don't worry, that's only apple juice in the big bourbon bottle. 

Update: I loved this look so much that I had to redo it and take a few more photos. All the photos under is taken by Kake Yamamura


Lilith Borderlands 2 - Styling a wig

I have only styled my Vi wig previously, so this was very different and difficult. Lilith has a hairdo that defies gravity. 


My first attempt failed, as I only used hair spray. In my despair I sent a PM to Nebulauben and Eirikku-kun who had made an awesome Lilith. And they were really awesome and answered within the hour (creds). 

Below you can see her (Nebulauben) wig.

What I did wrong was not using a hair dryer. Seems so simple now that I know it. 

Here is a youtube video illustrating the process, (from ca 2min in) 

What you do is section the hair into one and one spike, then spray it and immediately use the cold fan from the hair dryer. 

That's it actually. Then you have to cut it, to the different spikes get the correct lenght. 

And last I spray painted the tips white. 

Startup wig from ebay. This one was not really red enough, but it worked fine for my first attempt. 
The result. 
NB: This photo is edited in Photoshop, as you might see on the white tips of the wig. I used white spray paint to color it, but the effects was a little pale after several hours use outside. 

søndag 15. september 2013

Lilith Borderlands 2 - making the outfit

The making of this outfit was pretty basic, as I bought several clothes with the aim of re-sewing them. Not that re-sewing is the easiest thing in the world, but Lilith's clothes are torn so you don't have to be so careful in the process. 

The Jacket
Bought a cheap jacket from a Thrift shop. 

 Modified it and added details


Shoulder details


The details are in the game actually leather sewn in, but that took forever. So this is my short cut, net fabric sewn over black skai (faux leather).


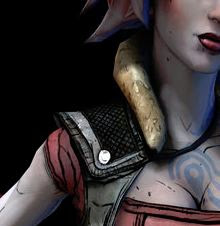
The fur collar is dyed yellow using markers and styled using hairspray. (Because it would never stay in place if not)


The top
Was made by modifying a tank top and adding shading and cel shading. 

The color is a little off; I will fix that in the next iteration. 

The Cardigan
The yellow cardigan is made from plain yellow fabric, with a zipper and a lot of shading. 


The leg pouch
It is just a cardboard box with black skai (faux leather). Then I added a piece of foam and a tube with blue el wire (so it lights up).


 That's all the photos I have. Keep asking questions.