mandag 12. november 2012

GameX 2012 and Bioware

I was a lucky winner of Bioware's facebook competition and was invited to meet them at Gamex. And I love their approach to their fans. While others might give out some free stuff at thier booth, Bioware invited their fans to a medieval inspired feast where they brought in Senior Writer David Gaider and Creativ Director Mike Laidlaw via Skype for questioning. And they even got Mark Meer, MaleShep voice actor, on Skype for a geeky chat. 


Lion Martinez (the man organizing this gathering) wearing a new armor at the feast. 

And Gamex was awesome in general, mostly because I walked around in cosplay accompanied by a fantastic femShep by Karin Olava Pettersen. My favourite moment was me as Tali dancing with Shepard at the Wii booth. 


Shepard dance
Don't worry, Chris Priestly filmed it all

Awkward elevator ride

And I got to be on stage with Holly Conrad, Bioware's official FemShep. And she is amazing, giving us a lot of tips on making costumes and just chatting about techniques and sculpting. 


On stage with Karin Olava Pettersen and Holly Conrad

One of the best parts was that I felt that everyone from Bioware was genuinely interested in me and wanted to hear my opinions and give me feedback. They greeted us in hallways and reminded us to see their panels (as winners we get to enter before the rest, securing god seats) 


I love being VIP

And we also got free stuff of course, my favorite being the signed Mass Effect art book and the limited Dragon Age necklace.


Thank you Bioware!


fredag 9. november 2012

Eleanor Lamb - Bioshock 2 Cosplay

Since I already have the helmet and most of the suit I figured that I could make another Bioshock 2 cosplay in the form of Eleanor Lamb.

Reference 


And my result
Photo and editing: Dan Michael Løvdahl/Danarki

Photo and editing: Dan Michael Løvdahl/Danarki

Photo and editing: Henrik Møller

Photo and editing: Annah Lång

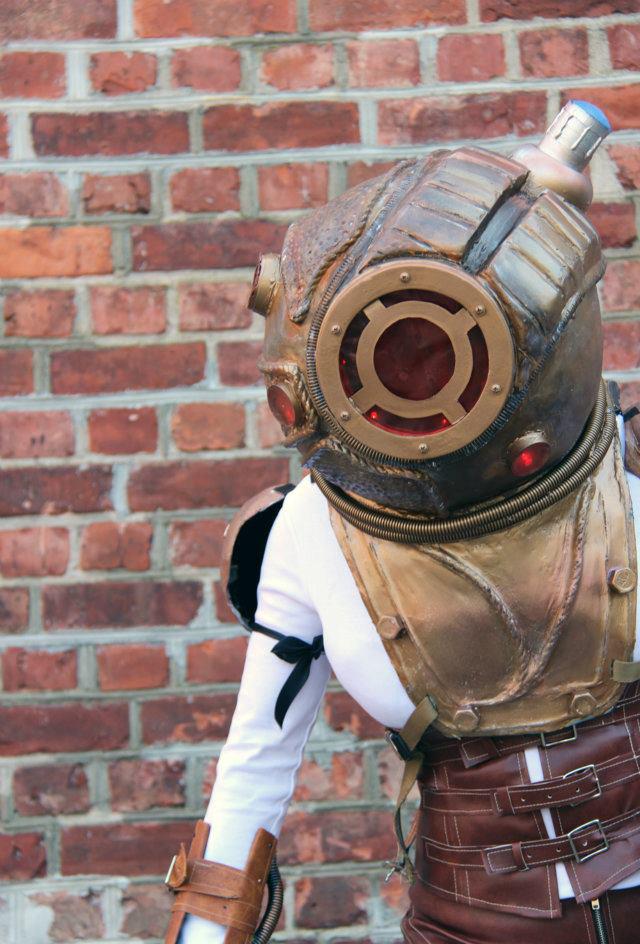
The upgrader from Big Sister is the body suit, which is simply a white long tshirt and thights sewn together with a zipper added to the front. other details are sewn or painted on using a reference picture. The helmet is also improved. Better padding and bolts on the lower part and new green leds. The red ones are still there in case I want to go for Big Sister again. See this post for how I made these parts:

  • The helmet
  • Lower part of the helmet
  • Corset and shorts
  • Other part: boots, leg armor, tank
  • Adam Syringe

  • And yes, It is now possible to take off the helmet without taking off the lower part - so I can get some air sometimes.  

    tirsdag 6. november 2012

    Bioware signed my Tali helmet

    I made a new Tali helmet for my meeting with Bioware at Gamex and I got Holly Conrad, Jessica Merizan and "Evil" Chris Priestly to sign it. Awesome. I will post more about my adventure with Bioware later. 


    My Tali helmet signed

    tirsdag 3. juli 2012

    Skyrim Cosplay - Iron Armor in progress


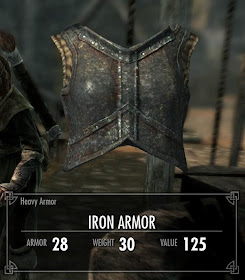
    Armor (chest) - Iron Armor 
    For my Dovahkiin cosplay
    Other parts here: 


    I have seen others make this armor out of wonderflex and thermoplastics. Due to limits concerning time, budget and availability I went for a known approach - paper mache. See post about Big Sister helmet for more info about paper mache.

    My mold this time was my tailor bust which I covered in plastic.


    Wrapping my Bust in plastic and putting on layer upon layer of paper mache

    The dried up piece with trimmed edges. To stiffen the paper mold you could paint on a layer of epoxy and glass fiber on the back. A simpler, but not as effective method is to cover the inside with duct tape, as I did. 


    Front and back ready for details and filler. First coat the molds with filler and sand. Then glue on cardboard details. Than cover everything with filler again. 


    Back piece primed and sanded. 


    Along the lower edges I have attached a new layer of cardboard, covering it in filler to smooth out the edges. 


    Weathering, schmearing out black paint. Elevated areas (details) are just layers of cardboard glued to the original cast and covered with filler.


    The front and back pieces are attached together using skai strips and velcro. The shoulder guard is made from paper mache over a balloon with cardboard details, too bad I don't have pictures of this process.


    Skyrim loot. 


    cosplay dovahkiin
    Photo: Kake Yamamura/Kakeboksen


    Next up - Iron Gauntlets

    fredag 29. juni 2012

    Skyrim Cosplay - Steel Battleaxe in progress

    I wanted a big weapon for desucon. Therefore I made a Steel battle Axe. I scaled it down a bit so I could get it inside Desucon, because this is a huge weapon.


    Cardboard
    The blade is made from cardboard.

    Skyrim batlle axe
    The shaft is made from plain pine rod from local hardware shop. It will show a beautiful wood pattern when painted. 

    Another layer of cardboard with foam mat in between. I also used cardboard for the axe edge (not shown on the picture)

     All edges were filled with paper clay which were sanded down, filled up with filler and sanded down again. This took a while, so jumping ahead. It is important to not lose hope at this stage, it will look better. 

    After sanding (I recommend a sanding machine) the blade was primed and painted silver. The rod for the handle was painted warm brown using basic acrylic paint. Strips of Skai (faux leather) was nailed to the handle following the pattern from my trace, using furniture nail from Jula.

    The end piece is the top of a metal shaker (so I could lean it on the floor without it breaking)

    The blade is nailed to the shaft. By using cardboard and filler you will have a very very brittle base. Therefore it won't survive ruff handling. 

    Weathering, you may have seen this at my previous posts, all details are painted by hand using my vector axe for reference.

     Full size axe

    Bloody deatails

    Axe in use
    Photo: H. Nyhus 

    So, next up - Iron Armor
    Other parts

    mandag 25. juni 2012

    Skyrim Cosplay - Helmet second round

    Earlier I made a simple Skyrim helmet. Afterwards I have seen that there are several flaws I would like to fix, so I did. And made the rest of the female Dovahkiin costume at the same time. 

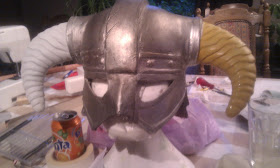
    This time I started with this (see my previous blog post about making a Skyrim helmet):
    Photo: Christina Bårdsen

    But it should look more like this:

    First things first, the horns looks too much like croissants.That must be fixed. And I need more details all over, which means strip down the paint and on with more filler.

     Strip down paint


    Adding filler


    More details around the edges, made from pizzabox cardboard.

    Ready for priming, added axe mark in front. 

    Primed, now silver paint

    Weatering
    Start

    Add black acrylic paint and drag it out, see Volpin's video 

    Helmet back
    Backside of Skyrim Helmet. I hade received questions about what the helmet looks like from behind. If you have the game you can find a helmet and rotate it. 

    Base coat on the horns

    One horn ready - I used darker brown and faded it out from each ridge. Add some blood and I'm done

    Finished helmet - Female Dovahkiin cosplay
    Skyrim Cosplay


    So now I am more satisfied with my helmet. Next up: Axe!

    fredag 15. juni 2012

    Big sister -Helmet part two

    Continue with my Bioshock Cosplay

    In this post I have continued describing how I made the Big Sister Helmet (See here for first post). I will now guide you in the process of detailing. This is how far I came last time:


  • Lower part of the helmet
  • Corset and shorts
  • Other part: boots, leg armor, tank
  • Adam Syringe


  • The paint job
    Before painting I still needed to sand and add more filler to get an even surface.

    It was really hard to find the right shade of bronze; this is the result of three different types and a brown and rust weathering treatment. 


    More Details have been added before the paint job, like the light covers (which are soy trays that come with take away sushi). There are three red lights on the helmet - The blue light-cover on top of the helmet is the cap of a hairspray bottle. (I love this kind of low tech prop making, and it is cheap) 

    After the paint was done I started to the weathering process - see my skyrim helmet tutorial for more details about weathering. 


    For rust details I used orange paint along all the outer tubes and used a sponge to even the color out. And little fishes were added on the back.

    The helmet and chest piece was fixed together using duct tape, in case I need to take them apart. 


    Lighting
    The wiring is very simple 11 LED connected in series, 7 red and 2 blue. Remember to use a resistor when working with LEDs. 


    I figured I might like some fresh air while inside my suit, so I made it possible to open the port hole using a small hinge and velcro. Taking advantage of this I placed a small switch in front, so I could turn the lights on and off at will. 

    In conclusion this was a fun, but very demanding project. 

    The finished helmet for my Bioshock Cosplay

    Bioshock cosplay
    Photo: Aslak Sødal