So I made my very first piece of armor with worbla a little while back, check out the build process here. And this is how far I got. And here are the tutorials for the other parts of the costume.
I looked for tips on how to paint worbla online, but the results were scarce. Luckily I was got to meet Kamui in person and ask her directly how to best paint worbla.
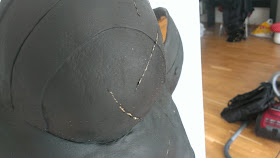
The surface texture of worbla is a little rough, and even though Vi has a pretty worn armor it needs to be smoother. So I primed it with Gesso (bought at panduo in Norway). In the picture below I have ca seven layers with gesso painted on with a brush. Sand down before paint.
Another tip from Kamui was don't glue anything on with hot glue if you can avoid it. So the D-ring on the back is attached with more strips of more worbla.
This material sticks very well to itsef when warmed up, there is no chance that these will fall off.
Before painting further I took my dremel and and added some battle scars to the chestplate.
Sand it down, maybe another layer of gesso and it is time for paint. First a layer of the the same gray shade as used on the hands.
And then a thin layer of silver.
Detailing - The best part of a prop! Gold is painted on the top with a brush.
And a dark grey wash is painted in the battle scars and along every line.
And every battle scar got high lighting using a silver pen. And last tip from Kamui was seal the paint and detailing with a coat of clear paint. Because why spend so much time to detail something that might wear off.
And it's done. Now back to make those hand more awesome before ncc.
For tutorials for the rest of the costume click here


Awesome job on the scarring
SvarSlett