mandag 8. juli 2013

Sea Goddess - Making the staff of Kraken

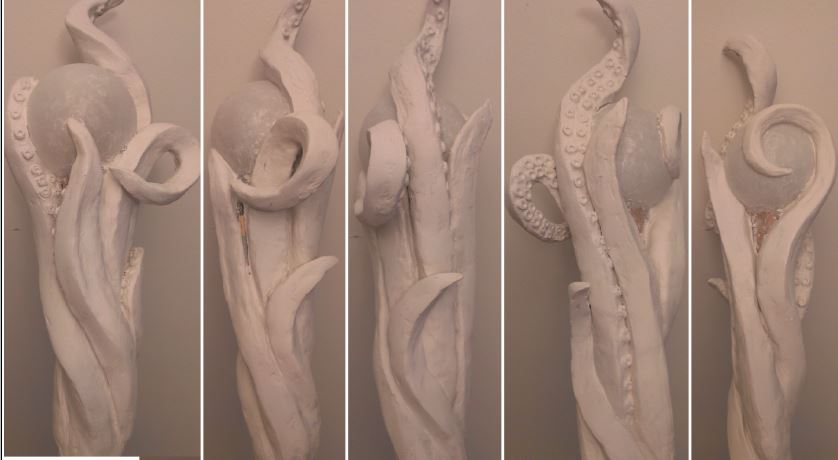
I got several comments that my new Kraken Staff looked a lot like my Elvish Staff. I might see their point, but when you hold them together I hope you see the difference. 

The method I used is very similar to how I made the first staff. 

The core of a roll of paper cloth (yes I have many of those, because you never know when you want to make a Gatling gun)

The tentacles here are made with strips of foam mat covered in aluminum foil, to help keep it in shape. 


Then you glue them to the staff.

This time I wanted a larger orb with more lights. And I am looking for an easy way all the time. So I used a Christmas orb with integrated light that runs on batteries. The battery pack I hid inside the staff core with the switch reachable. The orb was frosted with a thin layer of white spray paint. 
Test assembly with orb

With the orb glued in place I covered all the tentacles with paper clay. 

For the staff I did not use cheerios, but every sucker is hand sculpted. 

The painting
For the Elvish staff I used a technique where I first paint a light color and then smear a darker color over which sets in the creases, called weathering.

The the Goddess Staff I use a little different technique. I first painted the tentacles a lighter orange/brown color. Then I used a sponge to add and feather a darker brown on all the "highest" ridges of the tentacles. The suckers were painted lighter orange/pink with feathered edges to the main color. Shadows and depth were added with darker colors in and around the suckers. 

The tentacles were blended in with the rest of the staff using a sponge and the weathering technique. I wanted the rest of the staff to have a colder, rock quality, so the tentacles would really stand out. 

Even more details. 
Down the length of the staff I added several details. Like Balanidae and sea stars which I made out of clay, and different sea weed made out of hot glue. 


Summoning Kraken

søndag 7. juli 2013

Vi chest armor - painting worbla

So I made my very first piece of armor with worbla a little while back, check out the build process here. And this is how far I got. And here are the tutorials for the other parts of the costume.


I looked for tips on how to paint worbla online, but the results were scarce. Luckily I was got to meet Kamui in person and ask her directly how to best paint worbla. 

The surface texture of worbla is a little rough, and even though Vi has a pretty worn armor it needs to be smoother. So I primed it with Gesso (bought at panduo in Norway). In the picture below I have ca seven layers with gesso painted on with a brush. Sand down before paint. 

Another tip from Kamui was don't glue anything on with hot glue if you can avoid it. So the D-ring on the back is attached with more strips of more worbla. 

This material sticks very well to itsef when warmed up, there is no chance that these will fall off. 

Before painting further I took my dremel and and added some battle scars to the chestplate. 


Sand it down, maybe another layer of gesso and it is time for paint. First a layer of the the same gray shade as used on the hands.

And then a thin layer of silver. 

Detailing - The best part of a prop! Gold is painted on the top with a brush.

And a dark grey wash is painted in the battle scars and along every line.

And every battle scar got high lighting using a silver pen. And last tip from Kamui was seal the paint and detailing with a coat of clear paint. Because why spend so much time to detail something that might wear off. 


And it's done. Now back to make those hand more awesome before ncc.

For tutorials for the rest of the costume click here

fredag 5. juli 2013

Sea Goddess - how to make that nose.

I finally managed to make an Original Character (OC) mainly because I wanted to learn how to make gelatin prosthetics and I really wanted to make a tentacle staff. 

But now to the fun part - how did I make this concept come to life. 
Photo by: Savage Studios

This tutorial will cover the special effect makeup aspect, while this post guide you through the Staff build. 

That nose
The most dominant feature is the nose, or rather the lack of it. This look is inspired by Peter Gaal and there even is a tutorial covering how to make it. I will still guide you through my process and some of my thoughts and what was difficult with this makeup. 

To make the mold.
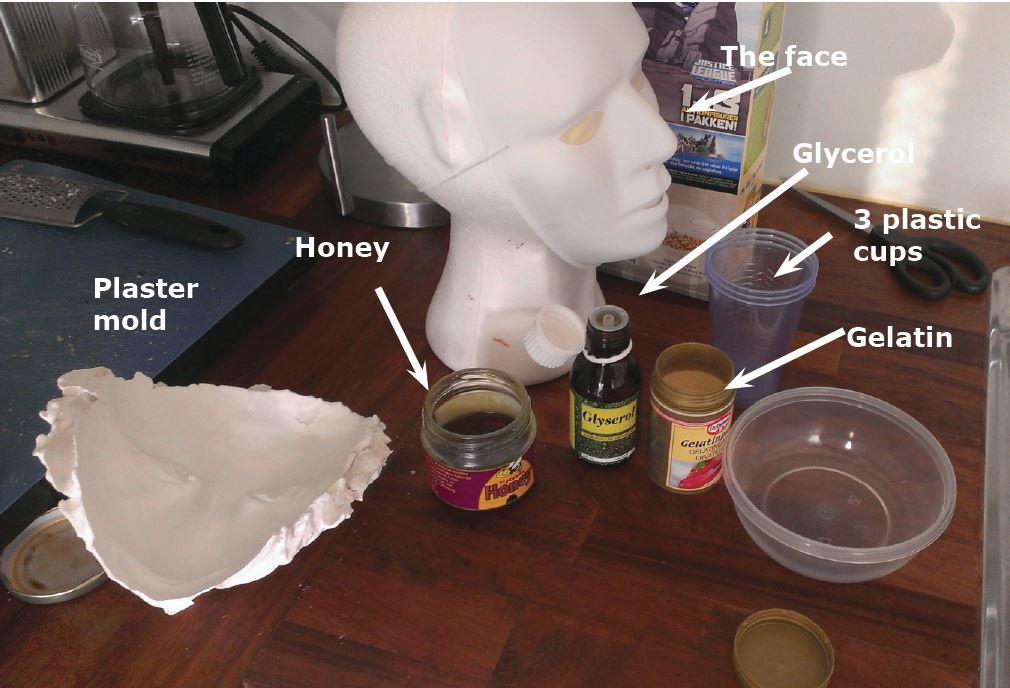
I don't have a cast of my face nor a mannequin  but I found another solution. I bought a white plastic mask and added clay to that (for you norwegians, it is actually cheaper at Panduro that at Standard). Then I covered my model with plaster like in the instructable. I used a Styrofoam head to hold the mask


Photos from the instrubtable


To make the gelatin
The ingredients are: Glycerol (bought at a pharmacy), gelatin powder (not sheets, bought at any grocery store, but Coop Mega have larger bottles) liquid honey and warm water. 


From the receipt I found I have 1 part gelatin, 1 part glycerol and 1 part that is 50/50 honey and water.

It is easier to mix the ca right amount when using equal sized cups. 

Then you mix honey, glycerol and water and give it a go in the microwave (20 sec)

After those 20 second add the gelatin powder and even out all the clumps. Heat it another 20 seconds and stir some more. In the picture below it is not done, if it looks like this you must heat it another 20 sec. Do not overheat it, rather take several turns in the micro. 

When the mix is liquid and runny (and as clear as it gets) you can add it to you mold. 

And then you press the cleaned mask into it. (easier if the head is with it, more to push on)


AHA! Something went wrong
Watch out for air pockets. But if you screw it up, just reheat the failed cast a pour it again. It was surprisingly easy to reheat, just be careful to do it little by little so you don't boil the gelatin. You have to really press the mold and mask hard together. 


And it was hard to get nice thin edges, so I used a hot air gun to melt the edges while my almost finished gelatin shape was still in the plaster mold, and when the edges got a little runny again I used the back of a spoon to drag them out. (sorry no pictures)

This is the prosthetic after I took it off, hence why it has makeup on. 

How to apply. 
As seen in the JadeFX video it seem so easy, but I had a little more trouble with the edges. It was easy enough to glue on using Spirit Gum, and is was stuck the whole day 

One problem is of course that I could not breathe through my nose, so drinking and eating was hard. 

Photo by: Nils Katla Photography

Tips to apply make up. I used a grease based makeup (Kryolan) which can be applied to both skin, latex and gelatin. It is also important to use several colors or feather it. One even layer of one color will seem very flat. Bring out cheeks and eyes with highlights and contouring. When you apply prosthetics you will get a seam where it meets your skin. You can blend this with glue, latex or liquid gelatin, but if it is still visible you can add features that take the attention away from your flaws. Here I have added white dots down my face and most people look at them or the long eyelashes, big contact lenses (or the fact that the nose is gone) instead of my messy edges.

If questions, ask away.

torsdag 4. juli 2013

Sea Goddess - How to make the tentacles and fins

I got a lot of questions on how I made the tentacles in my hair and the fins on my arms. And they were surprisingly easy to make. 


Let's start with tentacles. 
I wanted to be able to curl and shape them as I pleased when they were done, so the core is wire. 

Then I twined wadding around and rolled it in plastic wrap (the "clingy" kind)

Then I gave it a couple of coats with liquid latex.

"All my suckers are cheerios"
Yes, I used cheerios for the suckers. I don't know if this is a solution that will last for ages, but for short term tentacle they worked magnificently. I dipped one and one cheerio in latex and attached it to the tentacle. Since latex bond very well to itself there was no need for glue. Then I covered the cheerio completely with latex and let it dry. Remember to powder latex or it will stick to itself when you curl the tentacles. You can powder with transparent powder (expensive) baby powder, potato flour or even regular flour if that is all you have. (Baby powder/talcum is preferred though)


Painting
Acrylic paint have a tendency to flake from latex, so I used grease based body paint (same as for the rest of my face) and added details with acrylic paint after. Again, remember to use several colors for detailing or it will look flat and boring. I like to use at least three colors for everything I do. 


This is the same tentacle; the wire makes it good and flexible

When done with painting I like to seal it with transparent powder, the expensive stuff this time to not dull the colors. And finish off with fixing spray. This will also give them a glossy look. And the paint won't rub off. 

They are attached to my hair using bobby pins. 

The fins
I am really pleased with how these turned out (my favorite part of the costume). And they are also simple to make. 

The spikes are cardboard and between is thin paper (matpapir på norsk). 


After glued together I covered it all with liquid latex

Then attached to the arm with spirit gum. The edges are feathered out using more latex and paper towels. 

Same procedure regarding the painting, grease paint, acrylic detailing and fixing spray. 

After the makeup is in place I added shimmer makeup to my arms and shoulders. This also take some attention away from any mistakes you might have made when applying it. 

The white dots also reoccur through every element of my costume (arms, face, ears, staff etc.)

And last - the ears
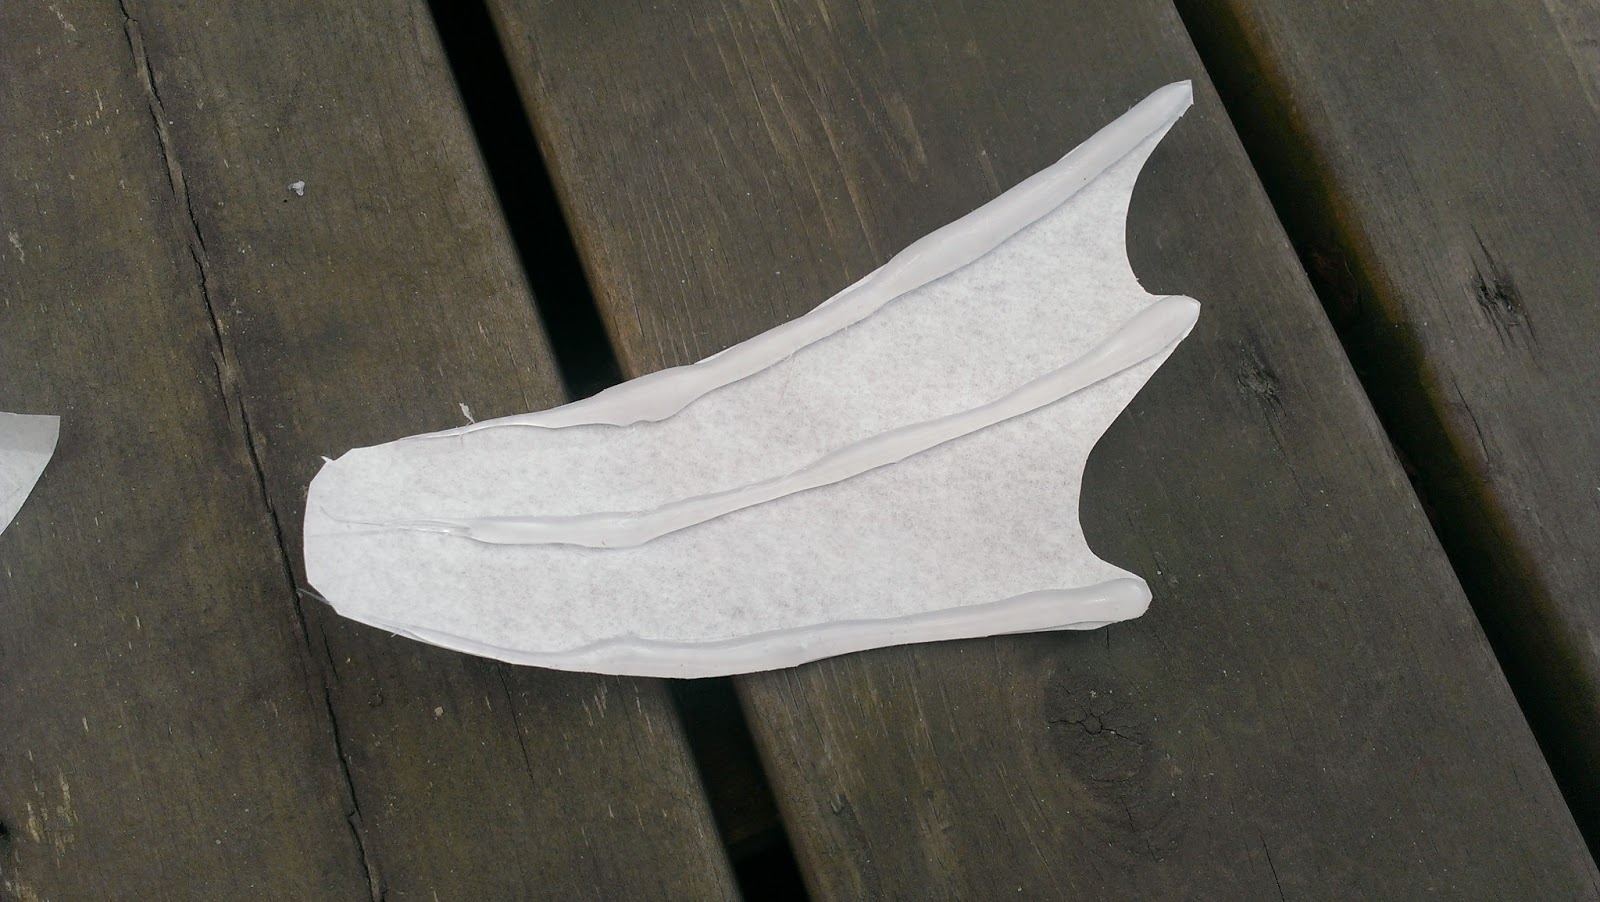
Thin paper with "hot glue gun" glue.

Adding latex

Testing

I took the fins off and painted them before gluing them back on on application day. Much easier to get all the details. Same color as with the arm fins and tentacles. 

Be careful not to glue you hair. The fin is just glued with spirit gum on top of my own ear and the edge is blended out with more latex. 

Another tip is to cover the edge with strands of your hair. 

The tiara
And here at the very end I want to include a few photos on how the tiara was made. Small pieces of cardboard are glued to a wire that is covered in masking tape. The entire piece was painted gold and weathered. Lightweight and cheap. 


Photo by Nils Katla

I hope this helped a bit and that you will be creative and try to make something yourself. I would love to see what you are making, perhaps send me an email. And as always, if you have any questions just ask, I love to answer.