
Photo: Pål Andresen
There are several things I wanted to do better
- More dimension on the back of the hand, it looks a little flat from the side.
- Better blue crystal, again too flat.
- Better finger joints
- Overall better finishing on details
- And make it steam!
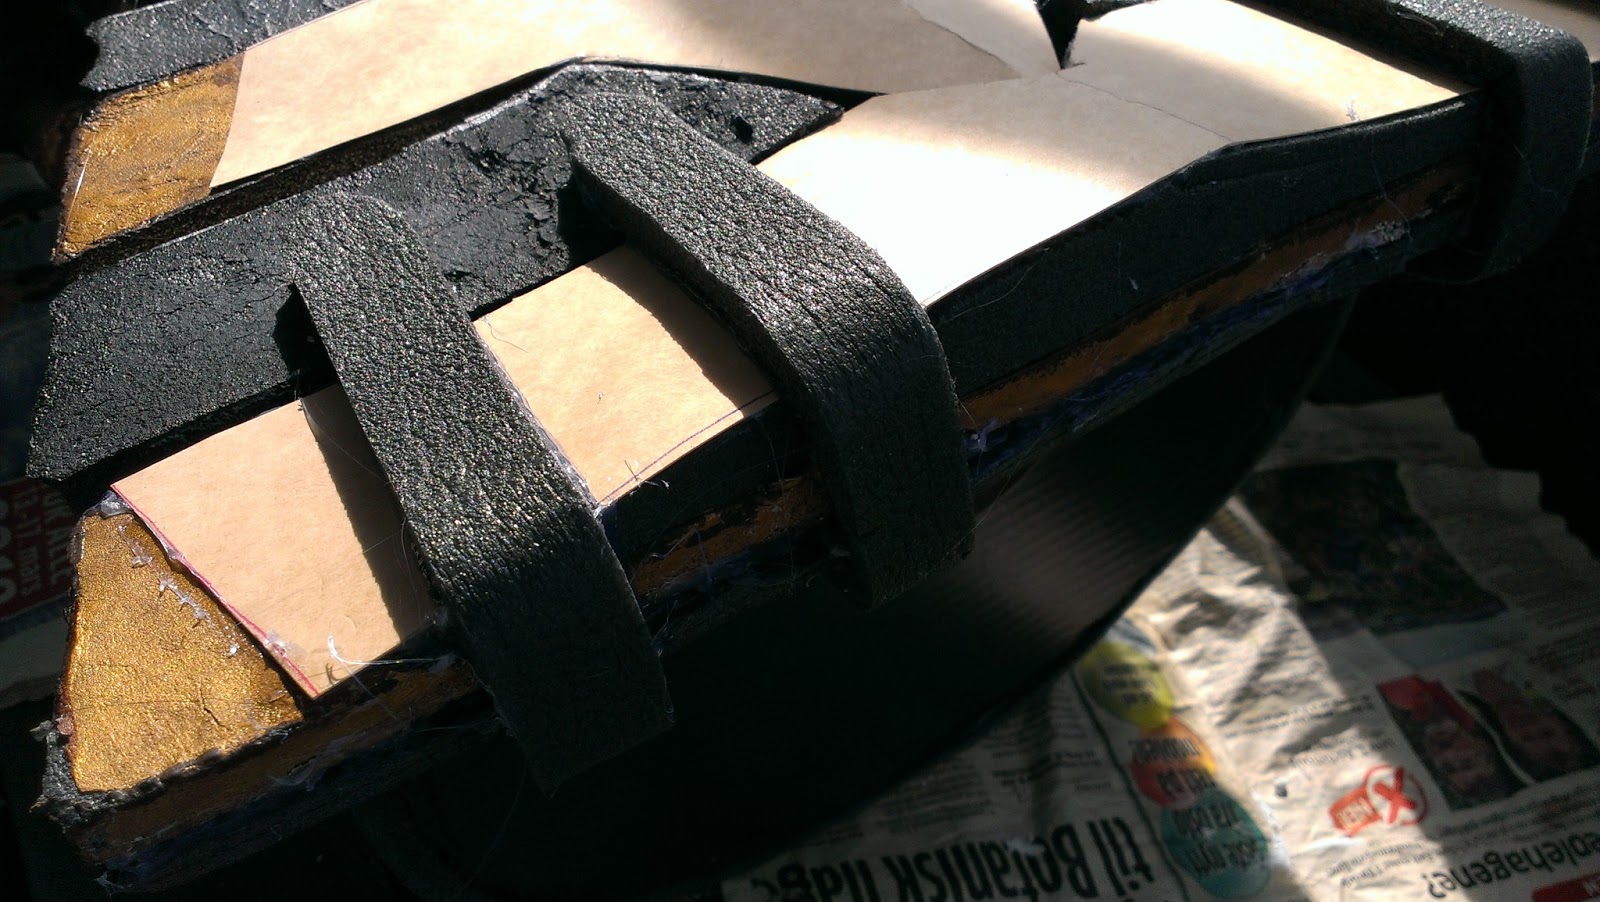
More dimension
In short add more foam, which means everything have to be repainted. I only had to build up on the very top and the lower part of the hand, and to make it a little easier for my self, I covered some of the surfaces with card board. This is because the foam is very porous and it would take some filler to get that smooth surface which again means more weight (I am a puny girl, make it light weight please).

Close ups of what have been added.


Then I evened out the surface with filler and repainted the body.


I made a mold for either vacuum shaping or cast in resin. My first attempt on the resin cast was a failure, and since I finally found a workshop with a thermo vacuum machine this would make a more light weight crystal. (I'm not kidding, every gram counts for me when carrying these).
The crystal was made with paper clay around a tin foil core, sanded down and covered in spray paint (gold was closest apparently).

The cast/pull was made from transparent thermo plastics which I spray painted blue on the inside.


The fingers
The springs I used initially did not create enough tension to flex the fingers, so I added small strips of plastic (from el strips actually)


The fishline going through the finger


I even filmed and tried to explain better how they work.
Make it steam!
I am a sucker for extra features, it already glowed and moved the fingers, so the next level is making it steam like it does in the animated login video.
Luckily the base of the hands are hollow, so I have room to integrate the steam system. You can see the result in the video of my performance a little further down. Later I will film the gloves close up and how the steam works.
How did I do it you wonder? I started with a smoke detector tester which emits a non toxic gas.

To activate it I used a small model plane servo, a battery pack and a servo tester, because the servo doesn't start spinning unless there is a signal telling the rotor which position it shall stand in. Just hooking the servo to a battery just won't do it (I learned that from trial and error).
Then I just needed to attach the servo to the spray can nozzle, clay and gaffa did it. In the video below you can see how it works before I install it inside the hand.
My Fantastic smoke effect.

Photo: Tobias Keijser
Finished hands
This is how it looks now with integrated steam, lights detailing and the shit. And a video of my performance, steam in action.
And here are a few shots of the upgraded hands


Smash rock!

Photo by: Joacim Schwartz


your my idol :D
SvarSlettThis makes me want to work harder on making new costumes, thank you :)
SlettThis was so helpfull, thank you!
SvarSlettI love helping out, so glad you found it useful :)
Sletti felt in love with your work!
SvarSlettI have a question! When you earlier mention elastic on the back of the finger, what are they and how do you place them?
SvarSlettThey're elastic band that are glued over the joint to add "stretch" to help straighten out the fingers :)
SlettThank you so much! I'm using your guide to build my hands, and I was a little lost there!
SlettWhere did you get the Sleepsafe spray from?
SvarSlettA norwegian Firasafety shop, since it would be stopped in customs if I bought it from ebay :) But I have seen "smoke detector testers" and "smoke on a can" on ebay. Good luck :)
Sletthvilken butikk? :P sjekket litt på nettet men fant ikkeno
SlettJeg kjøpte fra tryggogsikker.no. Det ser forøvrig ut til at de ikke har den jeg kjøpte lengre, nå har de kun dette: http://www.tryggogsikker.no/html/103.html
SlettEllers med litt googling så fant jeg denne: http://sceneteknikk.mamutweb.com/Shop/Product/R%C3%B8yk-p%C3%A5-boks-type-MagiCan/SFX-B0145
Tusen takk :D
SlettAs scratches made? Sorry for my low English
SvarSlettThey are made using black and silver markers :)
SlettI really feel like you're my heroine kkkkk Perfect *--*
SvarSlettThank you ^_^
SlettNot sure how active this post is but i used it in 2016 to make my own vi hands and its been so long i want to refresh my memory. What unit of measurement did you use to design the back panel of the hands i use inches so i want to make sure i convert it if i have to.
SvarSlettWe use cm in Norway, so most likely that .
SlettDenne kommentaren har blitt fjernet av forfatteren.
SlettGo1den3ye is right, I use cm :)
Slett